
How to Troubleshoot a Leaking Stop Valve
A leaking stop valve is a common plumbing issue that can lead to water wastage, property damage, and increased utility bills if not addressed promptly. Stop valves, also known as shut-off valves, are crucial for controlling water flow to fixtures such as sinks, toilets, and appliances. When they leak, it’s essential to identify the cause and apply the appropriate solution.
This guide provides a comprehensive troubleshooting approach to diagnose and fix a leaking stop valve, covering common causes, step-by-step repair methods, and preventive measures.
---
1. Understanding Stop Valves and Their Components
Before troubleshooting, it’s important to understand the types of stop valves and their key components:
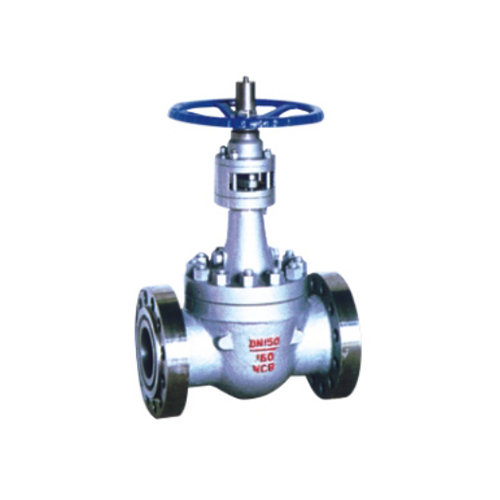
Types of Stop Valves
- Compression Stop Valve: Uses a compression nut to seal water flow when turned off.
- Ball Valve: Features a rotating ball with a hole to control water flow.
- Gate Valve: Uses a gate mechanism to stop water flow (less common in modern plumbing).
- Angle Stop Valve: Designed for tight spaces, often found under sinks.
Key Components
- Handle: Used to turn the valve on or off.
- Stem: Connects the handle to the internal mechanism.
- Packing Nut: Seals the stem to prevent leaks.
- Washer/O-Ring: Creates a watertight seal inside the valve.
- Body: The main housing of the valve.
---
2. Common Causes of a Leaking Stop Valve
Several factors can cause a stop valve to leak, including:
A. Loose Packing Nut
- The packing nut may loosen over time, allowing water to seep around the stem.
B. Worn-Out Washer or O-Ring
- Internal washers degrade with use, leading to leaks when the valve is closed.
C. Corrosion or Mineral Buildup
- Hard water deposits or rust can prevent the valve from sealing properly.
D. Cracked or Damaged Valve Body
- Physical damage or freezing temperatures can crack the valve body.
E. Improper Installation
- If the valve was not installed correctly, it may not seal tightly.
---
3. Step-by-Step Troubleshooting and Repair
Follow these steps to diagnose and fix a leaking stop valve:
Step 1: Turn Off the Water Supply
- Locate the main water shut-off valve and turn it off to prevent further leakage.
- Open a faucet downstream to relieve pressure.
Step 2: Identify the Leak Source
- Leak from the Stem (When Valve is On): Indicates a loose or damaged packing nut.
- Leak from the Outlet (When Valve is Off): Suggests a faulty washer or seat.
- Leak from the Valve Body: May indicate a crack or corrosion.
Step 3: Tighten the Packing Nut (If Leaking from Stem)
- Use an adjustable wrench to gently tighten the packing nut (clockwise).
- Avoid over-tightening, as it may damage the stem.
Step 4: Replace the Washer or O-Ring (If Leaking from Outlet)
- Disassemble the valve by unscrewing the bonnet nut.
- Remove the old washer and replace it with an identical one.
- Reassemble the valve and test for leaks.
Step 5: Clean or Replace a Corroded Valve
- If mineral buildup is the issue, soak the valve in vinegar to dissolve deposits.
- If corrosion is severe, replace the entire valve.
Step 6: Check for Cracks or Damage
- Inspect the valve body for cracks or fractures.
- If damaged, replace the valve immediately.
Step 7: Test the Repair
- Turn the water supply back on and check for leaks.
- If the leak persists, consider replacing the valve.
---
4. When to Replace a Stop Valve
If repairs don’t stop the leak, replacement may be necessary. Signs that a valve should be replaced include:
- Persistent leaks after tightening or washer replacement.
- Visible cracks or corrosion.
- Difficulty turning the handle (indicating internal damage).
How to Replace a Stop Valve
1. Turn off the main water supply.
2. Use a wrench to disconnect the supply line.
3. Unscrew the old valve from the pipe.
4. Install a new valve, ensuring proper alignment.
5. Reconnect the supply line and test for leaks.
---
5. Preventive Maintenance Tips
To extend the lifespan of stop valves and prevent leaks:
- Exercise Valves Regularly: Turn them on and off occasionally to prevent seizing.
- Inspect for Corrosion: Check valves periodically for rust or mineral buildup.
- Use High-Quality Valves: Invest in durable materials like brass instead of plastic.
- Avoid Over-Tightening: Excessive force can damage seals and stems.
---
6. Safety Considerations
- Always shut off the water before working on valves.
- Wear safety goggles to protect against debris.
- If unsure, consult a licensed plumber for complex repairs.
---
Conclusion
A leaking stop valve can often be fixed with simple adjustments, such as tightening the packing nut or replacing a washer. However, severe corrosion or cracks may require a full replacement. Regular maintenance and prompt repairs can prevent costly water damage and ensure smooth operation.
By following this troubleshooting guide, homeowners and DIY enthusiasts can effectively address stop valve leaks and maintain a reliable plumbing system. If the issue persists, professional assistance is recommended to avoid further complications.
Este sitio web utiliza cookies para garantizar que obtenga la mejor experiencia en nuestro sitio web.


 Teléfono
Comentario
(0)