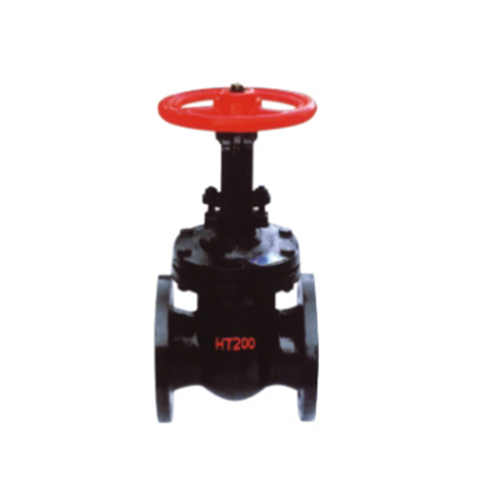
How to Repair a Butterfly Valve Without Replacement
Butterfly valves are widely used in industrial and commercial applications due to their simple design, cost-effectiveness, and efficient flow control. However, like any mechanical component, they can develop issues over time, such as leaks, sticking, or wear. While replacement is sometimes necessary, many problems can be resolved through proper repair techniques, saving time and money.
This guide provides a step-by-step approach to repairing a butterfly valve without replacement, covering common issues, troubleshooting, disassembly, part inspection, repair methods, and reassembly.
---
1. Common Butterfly Valve Issues
Before attempting repairs, it’s essential to identify the problem. Common issues include:
- Leakage (around the stem, seat, or body)
- Sticking or hard operation (difficulty turning the handle or actuator)
- Excessive play or looseness in the stem
- Corrosion or erosion of valve components
- Damaged or worn seat (leading to poor sealing)
- Misalignment of the disc or stem
Understanding the root cause helps determine the best repair approach.
---
2. Safety Precautions
Before starting any repair work:
- Isolate the valve from the system by closing upstream and downstream isolation valves.
- Depressurize the line to prevent accidental release of fluids.
- Drain residual media from the valve body.
- Wear appropriate PPE (gloves, goggles, etc.) to protect against chemicals or sharp edges.
---
3. Tools and Materials Needed
Gather the following before disassembly:
- Wrenches and screwdrivers (for removing bolts and fasteners)
- Soft mallet or hammer (for gentle disassembly)
- Pliers and snap ring tools (if applicable)
- Cleaning brushes and solvents (to remove debris and deposits)
- Lubricants (silicone-based or compatible with the valve material)
- Replacement gaskets, O-rings, or seals (if damaged)
- Emery cloth or fine sandpaper (for polishing surfaces)
- Torque wrench (for proper reassembly)
---
4. Step-by-Step Repair Process
Step 1: Remove the Valve from the Pipeline (If Necessary)
If the valve is flanged:
- Loosen and remove the flange bolts carefully.
- Use a pry bar if needed, but avoid damaging the flange faces.
- For wafer-style valves, ensure proper alignment when reinstalling.
If the valve is welded, repairs may need to be done in place unless removal is unavoidable.
Step 2: Disassemble the Valve
1. Remove the Actuator or Handle
- Unbolt or unscrew the actuator/handle from the stem.
- Keep track of fasteners and small parts.
2. Extract the Stem
- Remove the stem retention mechanism (snap rings, retaining nuts, etc.).
- Gently tap the stem with a soft mallet if it’s stuck due to corrosion.
3. Remove the Disc
- Once the stem is free, slide the disc out of the body.
- Inspect the disc for wear, cracks, or deformation.
Step 3: Inspect Components
Check each part for damage:
- Stem: Look for bending, corrosion, or excessive wear.
- Disc: Ensure it’s not warped or eroded.
- Seat: Check for cracks, tears, or compression loss.
- Body: Inspect for cracks, pitting, or corrosion.
- Seals and Gaskets: Replace if hardened, cracked, or damaged.
Step 4: Clean All Parts
- Use a solvent or degreaser to remove debris, scale, or old lubricant.
- Polish the stem and disc with emery cloth if corroded.
- Ensure sealing surfaces are smooth and free of scratches.
Step 5: Repair or Replace Worn Parts
- Seat Repair:
- If the seat is slightly damaged, use a compatible sealant or lap the surface with fine abrasive paste.
- For severe damage, replace the seat if possible (some valves allow seat replacement).
- Stem Repair:
- If the stem is slightly corroded, polish it smooth.
- If bent or severely worn, replacement is necessary.
- Disc Repair:
- Minor nicks can be smoothed with fine sandpaper.
- A warped disc may need replacement.
- Seals and Gaskets:
- Always replace worn O-rings, gaskets, and packing.
Step 6: Reassemble the Valve
1. Reinstall the Disc
- Align the disc properly with the stem.
- Ensure it moves freely without binding.
2. Reinsert the Stem
- Lubricate the stem with a compatible grease.
- Reinstall retention mechanisms (snap rings, nuts).
3. Reattach the Actuator or Handle
- Ensure proper alignment to avoid operational stress.
- Tighten fasteners evenly.
4. Test for Smooth Operation
- Manually turn the valve to confirm free movement.
- Adjust packing gland nuts if the stem feels too tight.
Step 7: Reinstall and Test
- Reinstall the valve in the pipeline (if removed).
- Gradually pressurize the system and check for leaks.
- Cycle the valve several times to ensure proper function.
---
5. Preventive Maintenance Tips
To extend valve life:
- Lubricate the stem and seals periodically.
- Operate the valve regularly to prevent sticking.
- Inspect for leaks or wear during routine maintenance.
- Use compatible materials for the media being handled.
---
6. When Replacement is Necessary
While many issues can be repaired, replacement is unavoidable if:
- The valve body is cracked or severely corroded.
- The disc or stem is irreparably damaged.
- The seat cannot be restored to a proper seal.
- Frequent failures indicate end-of-life wear.
---
Conclusion
Repairing a butterfly valve without replacement is often feasible with proper disassembly, inspection, and part restoration. By following these steps, operators can restore valve functionality, reduce downtime, and save costs. However, if damage is too extensive, replacement remains the safest option. Regular maintenance helps prevent major failures and extends valve service life.
By mastering these repair techniques, technicians can ensure efficient and reliable valve operation in various industrial applications.
Este sitio web utiliza cookies para garantizar que obtenga la mejor experiencia en nuestro sitio web.
Comentario
(0)